4 Ways to Remove Background in Photoshop
Remove the image background without design skills.


Your images may have cluttered backgrounds. To fix these images, you may use Adobe Photoshop: the evergreen tool to edit and enhance pictures. Adobe Photoshop may seem complicated to new users who are just trying out this tool for the very first time. But with practice, Adobe Photoshop can be a great ally for all your photo editing needs. Additionally, it not only allows you to remove the background but also replace it using its high-end tools. Let's understand the prominent tools and know how to remove the background in Photoshop!
4 Tools to Remove Background in Photoshop
Photoshop has a suite of tools that help with advanced editing. Each tool has a different method for removing the background. But they all have a specific objective that shall also be discussed.
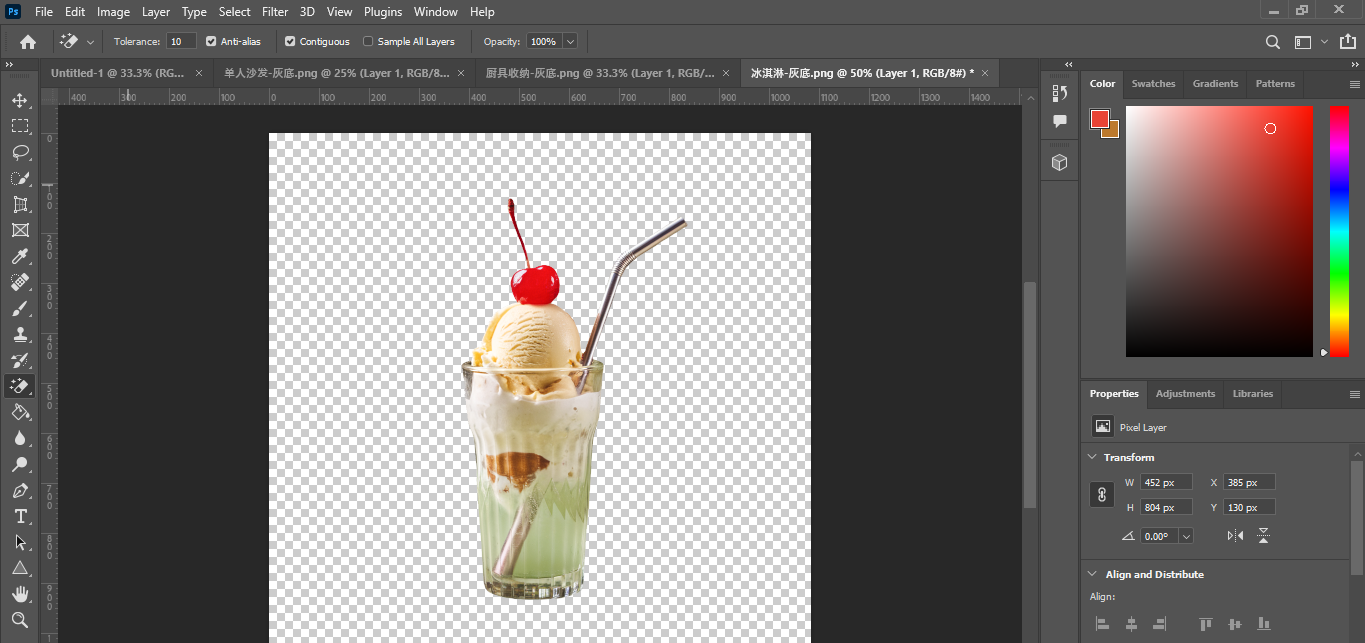
1. The Magic Wand Tool
You may find the magic wand tool in the left toolbar. It automatically selects the areas of similar color in one click.
It is best for images with solid, high-contrast backgrounds. You may also adjust the tolerance levels to control the variation in the colour. Here is how you can use this tool to remove the background:
Step 1: Click a custom size
Run Adobe Photoshop on your desktop and start creating a custom-sized image.

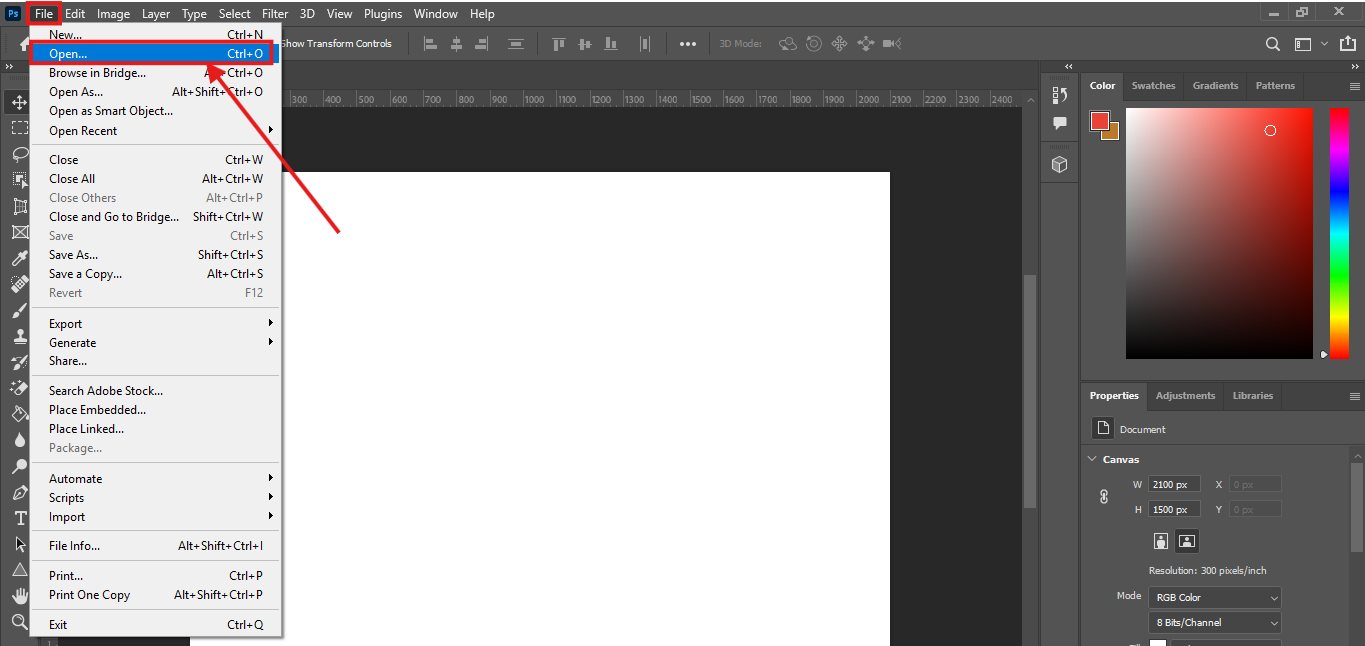
Step 2: Load the image
Click on ‘File’ in the top left corner. From the dropdown, select ‘Open’. Then choose the image that you want to edit.
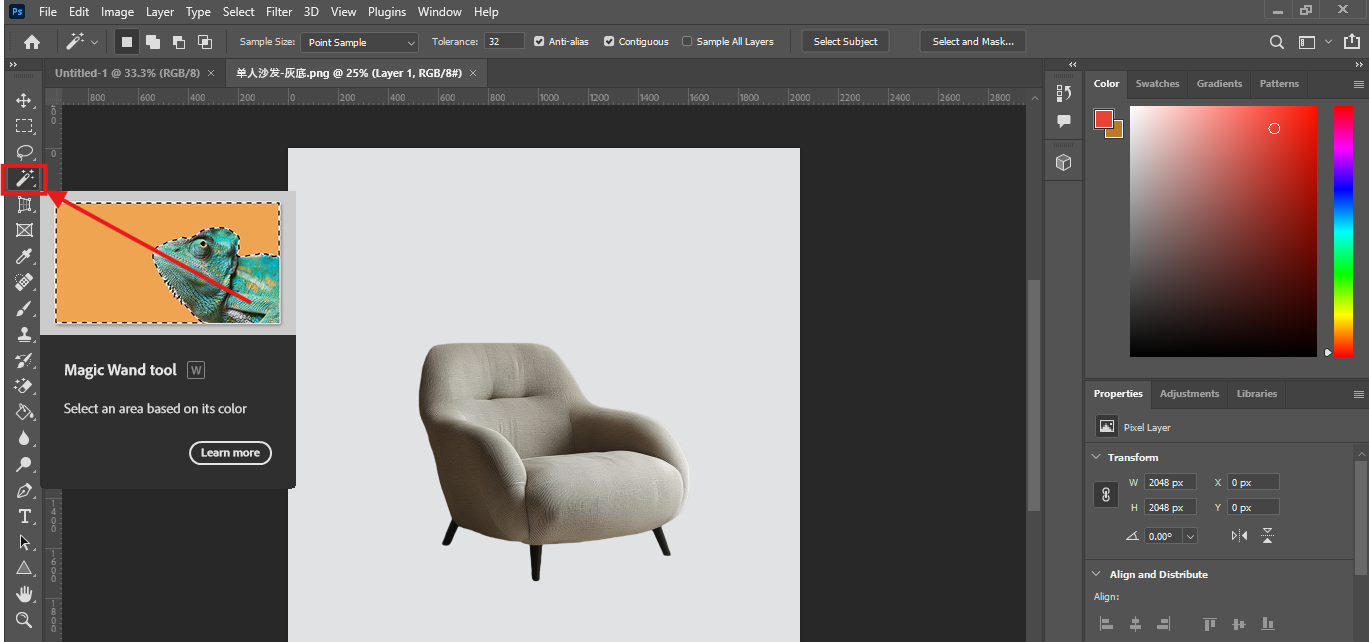
Step 3: Click the Magic Wand
Click on the Magic Wand Tool from the left toolbar. This allows you to automatically select the background of the image.
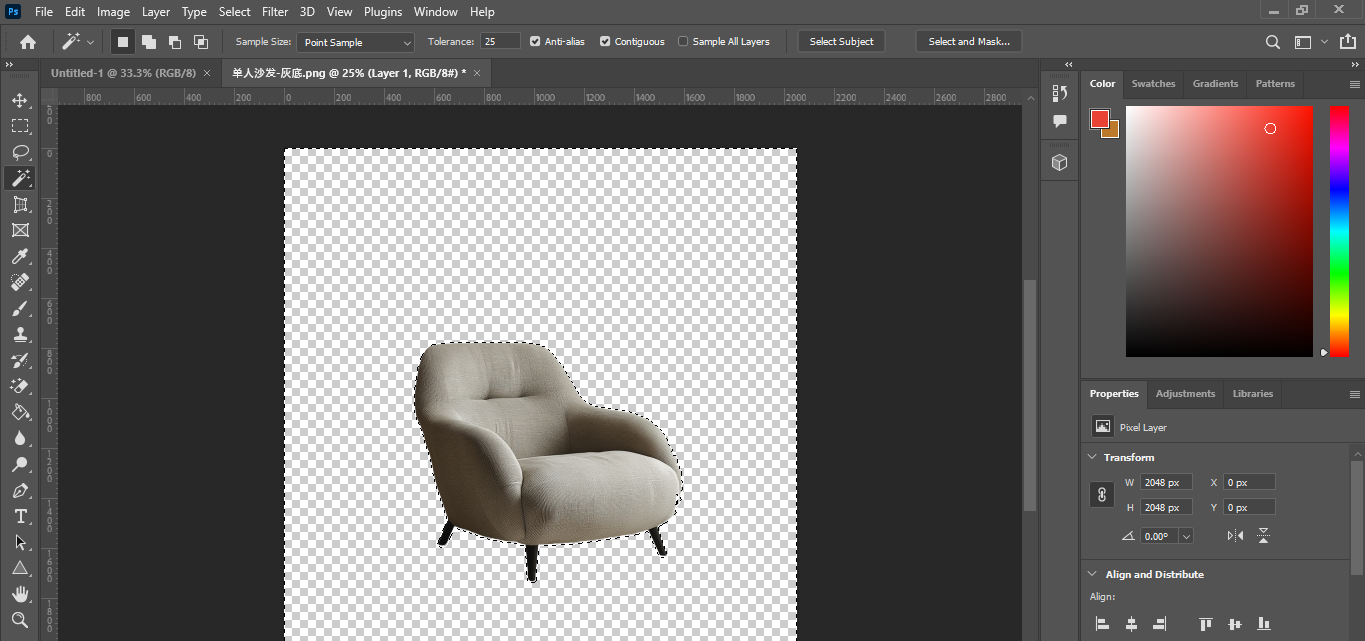
Step 4: Press Delete to Remove the Background
Once you click the image, the background will be selected automatically, and except for the subject, everything will be turned transparent when you press the ‘Delete’ option.
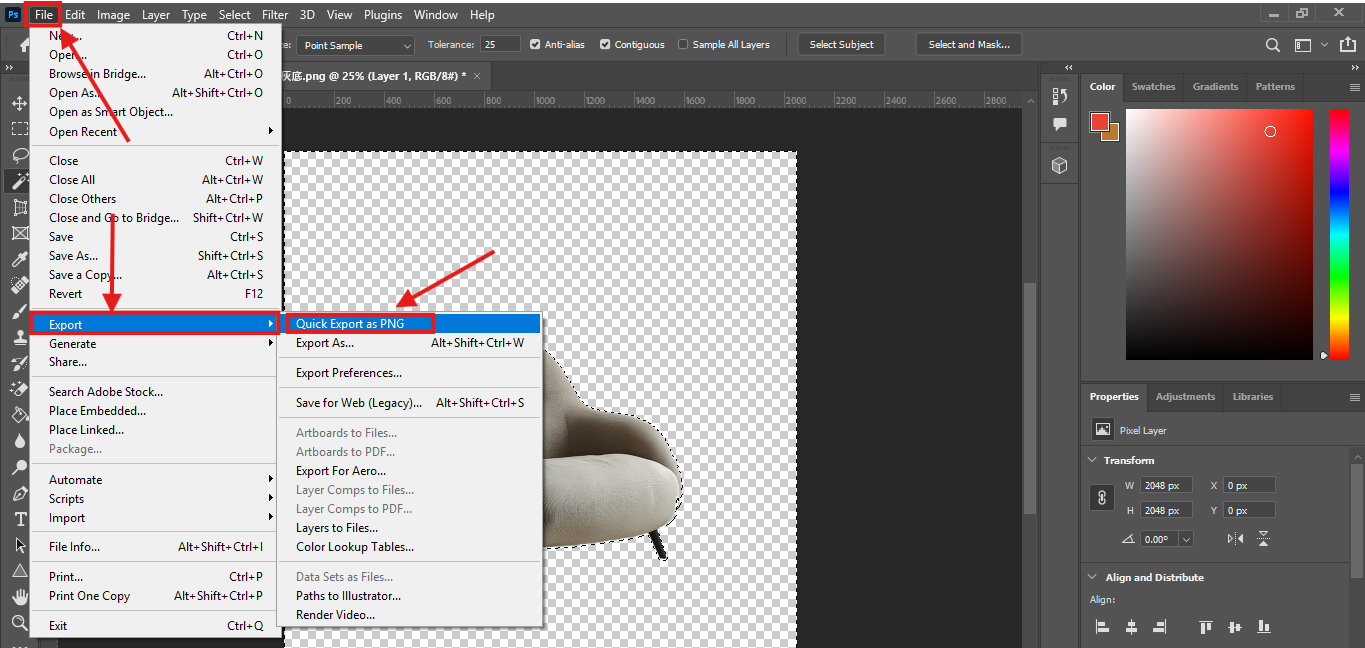
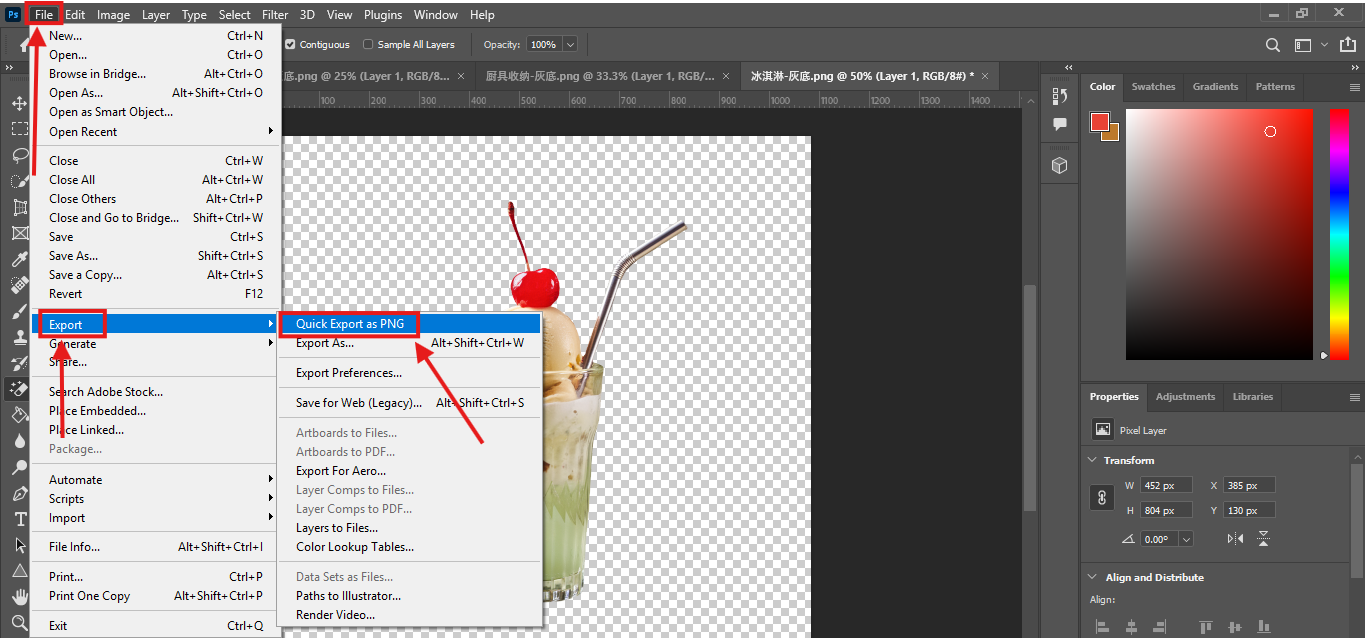
Step 5: Export the image
You can export the image by clicking on ‘File’ in the top left corner. From the dropdown, click on ‘Export’ and save your file as a PNG.
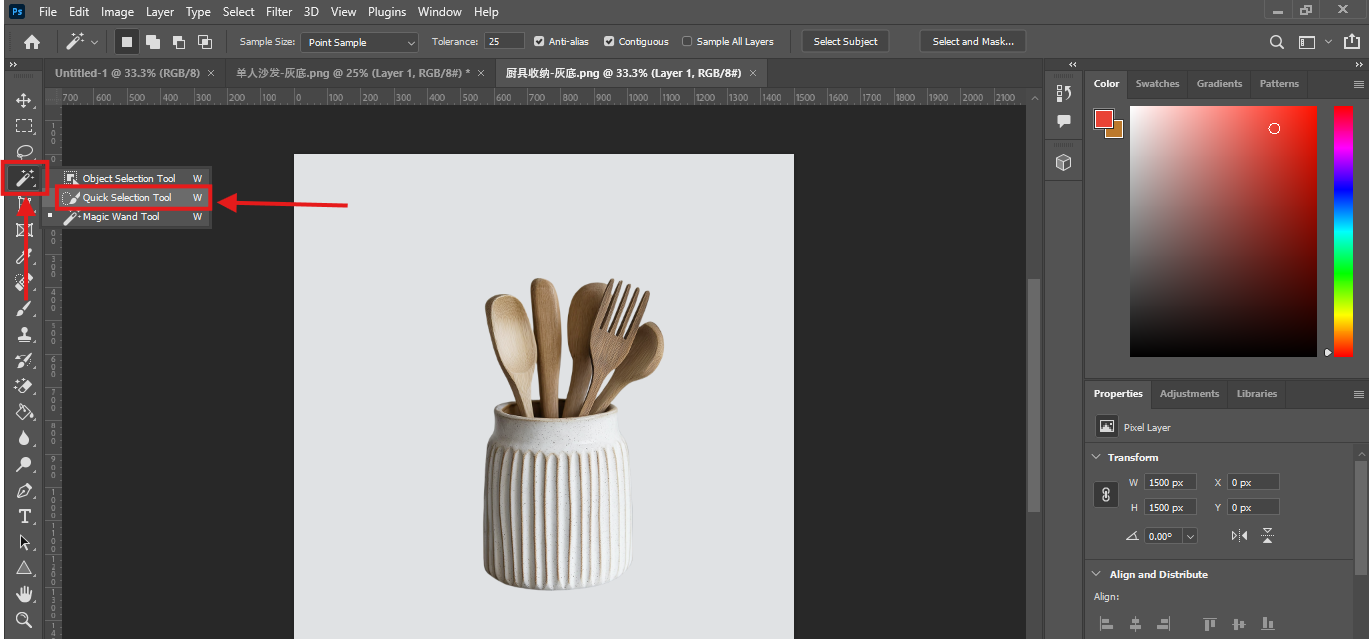
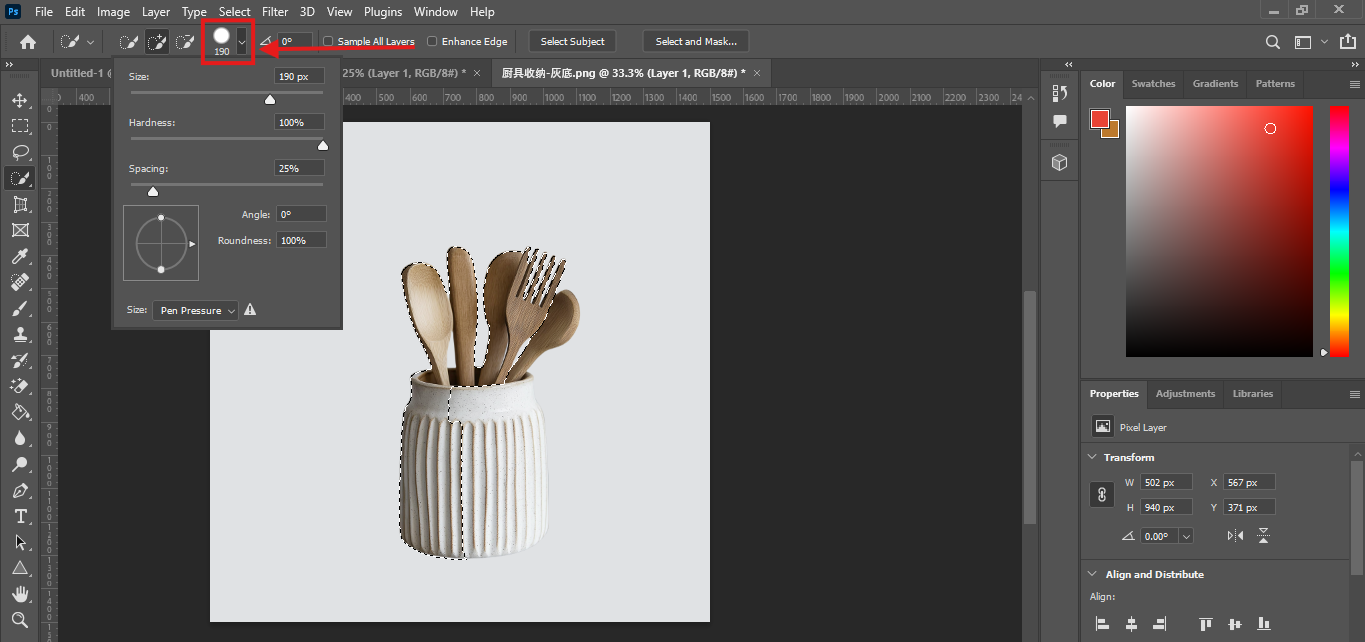
2. Quick Selection Tool
The Quick Selection Tool is a manual background removal tool in Adobe Photoshop. It is a tiny brush that helps you mark the areas you want to remove. It is an ideal option for beginners who are new to Photoshop.
The quick selection tool does not depend on the tolerance settings. It completely removes the areas that have been selected, and it is best for portraits and sleek products. Use this feature by following the steps listed below:
Step 1: Click the Quick Selection Tool
Upload a new image to Photoshop and click the Quick Selection Tool from the left toolbar.
Step 2: Adjust brush size and remove unwanted areas
On the top right, you get the option to adjust the brush size. Then, drag the brush on the areas that you want to remove. The image will become transparent when you press ‘Delete’.
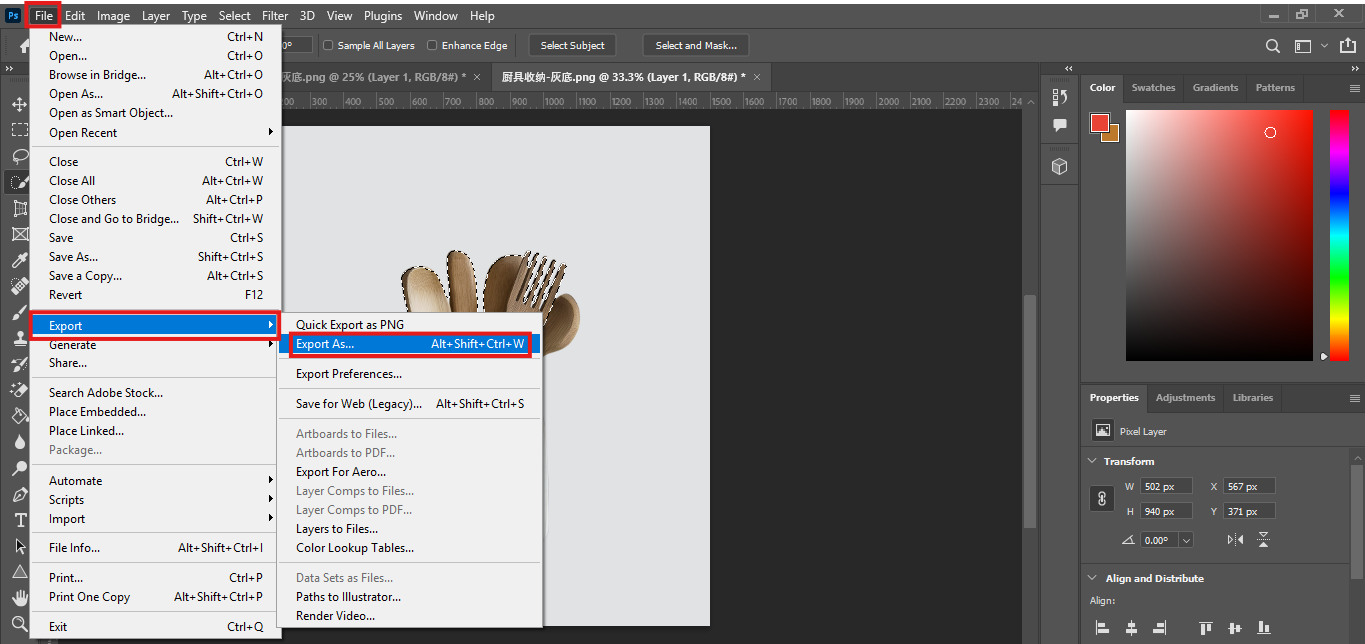
Step 3: Save the Image to Your Device
When the background becomes transparent, save it by clicking on ‘File’ and then on ‘Export’
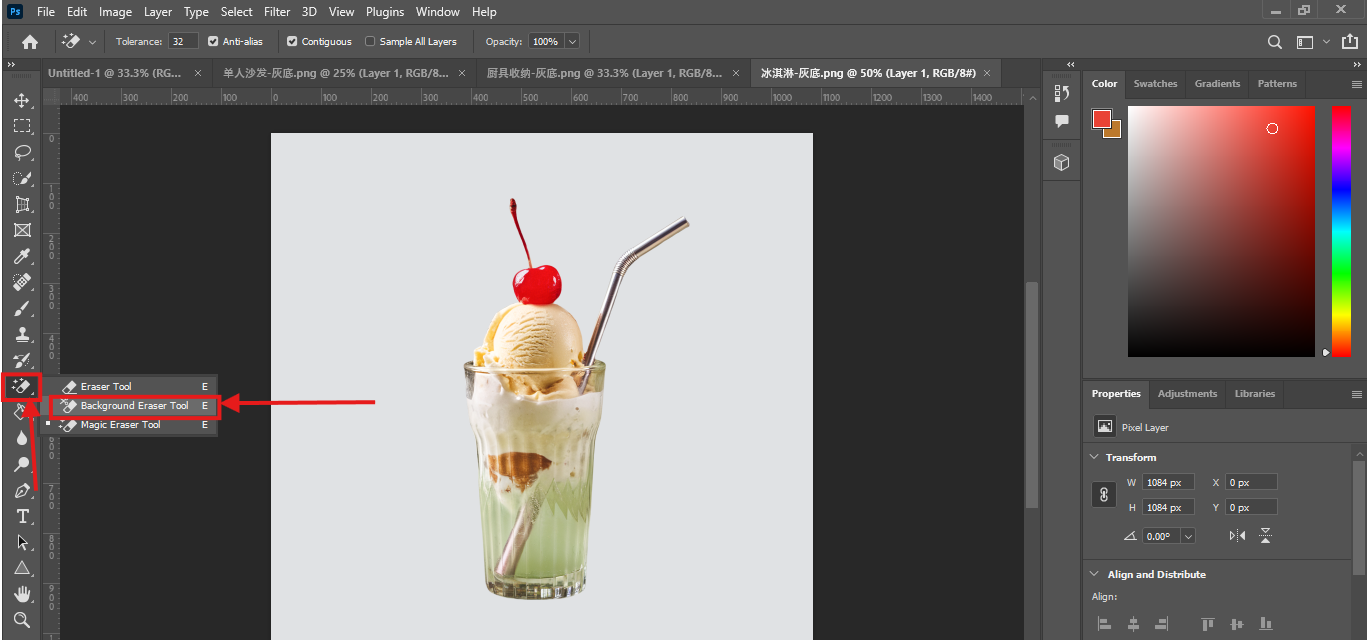
3. Background Eraser Tool
This tool allows you to remove unwanted pixels in the background. It may sample the colour under your cursor and prompt you to manually brush away similar pixels.
The Background Eraser Tool is ideal for adjusting minor details such as hair and smoke. The tool allows you to adjust the tolerance levels so that you can control the effect of this tool on your image subject. Follow these steps to use the tool:
Step 1: Click the Background Eraser Tool
Import your image into Photoshop. Then click the Background Eraser Tool on the left.
Step 2: Select the Background and Press ‘Delete’
Press ‘Delete’ after selecting the image background.
Step 3: Download the image to your device
Now the background-free image is ready to be downloaded to your device. Click on ‘File’ and then on ‘Export’ to download the image.
4. Layer Mask Background Removal
Layer masks help you to hide the background or parts of it when you are removing the background. It works well when you accidentally remove some parts of the image and need to restore them.
The best part is that you can always bring back the elements of the image. This is a form of non-destructive editing. It allows you to retain some parts of your image even after they have been deleted. Use these steps to remove the background:
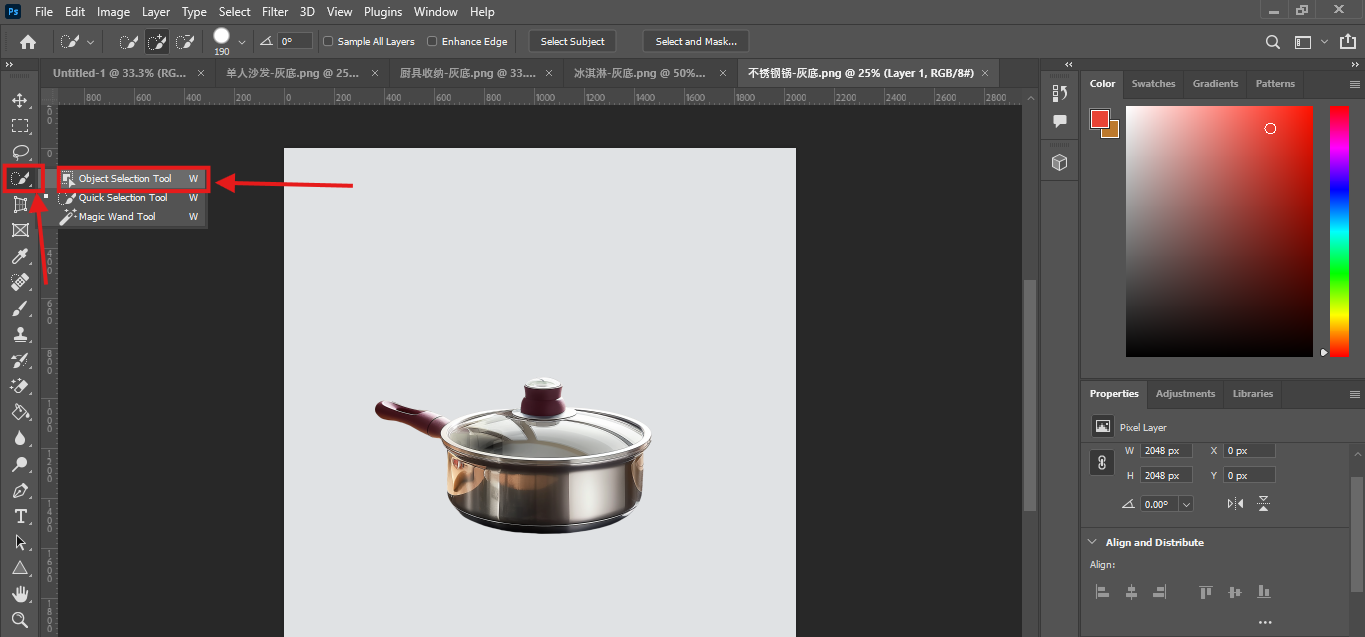
Step 1: Enable the Object Selection Tool
Import the image into the Photoshop editor and enable the Object Selection Tool from the left toolbar.
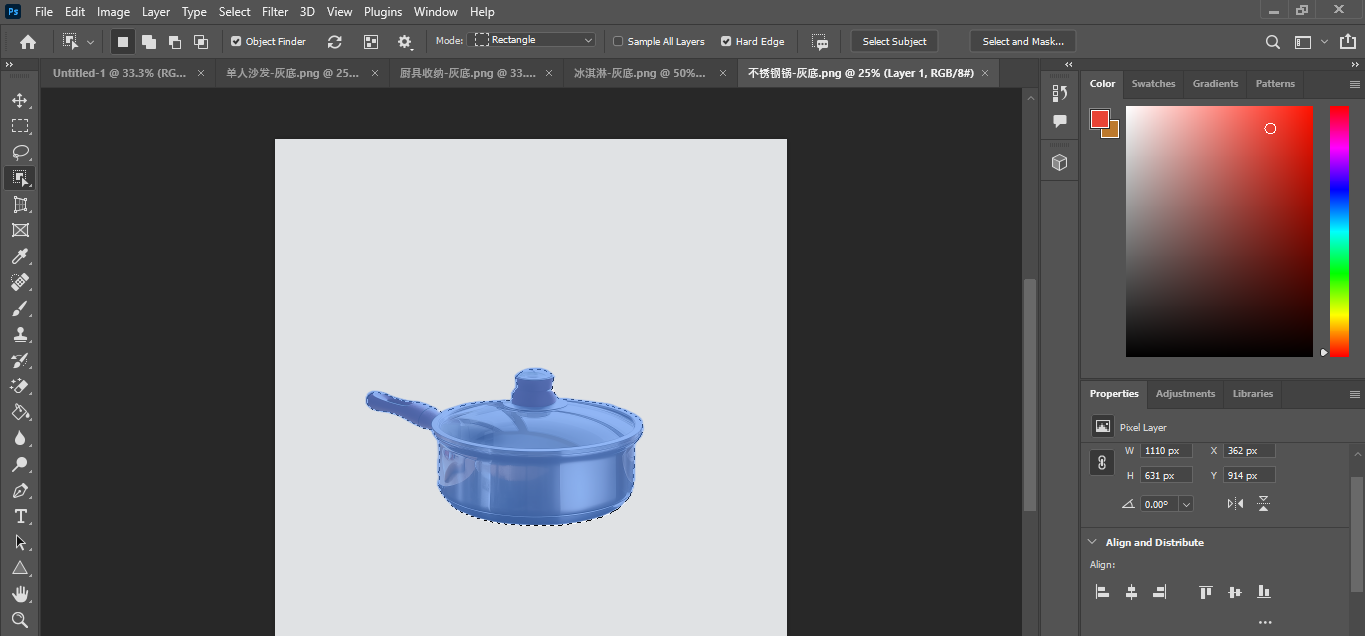
Step 2: Select the Subject
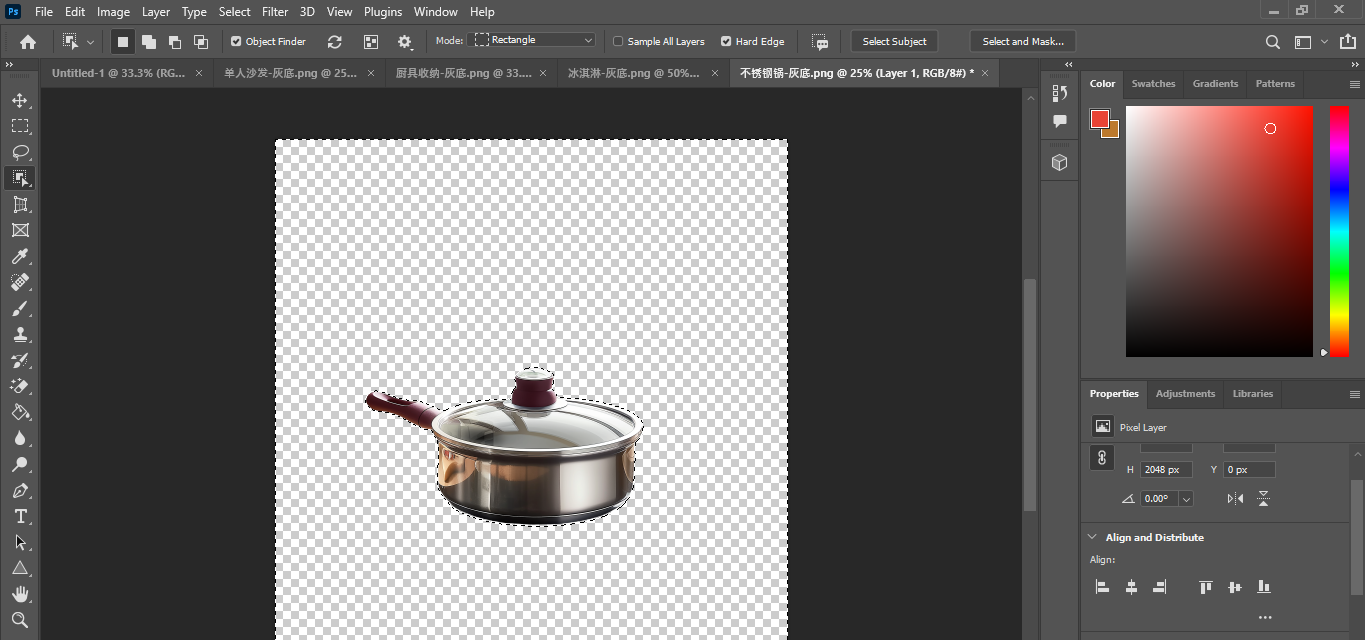
Select the subject, and the tool will highlight it, leaving out the background.
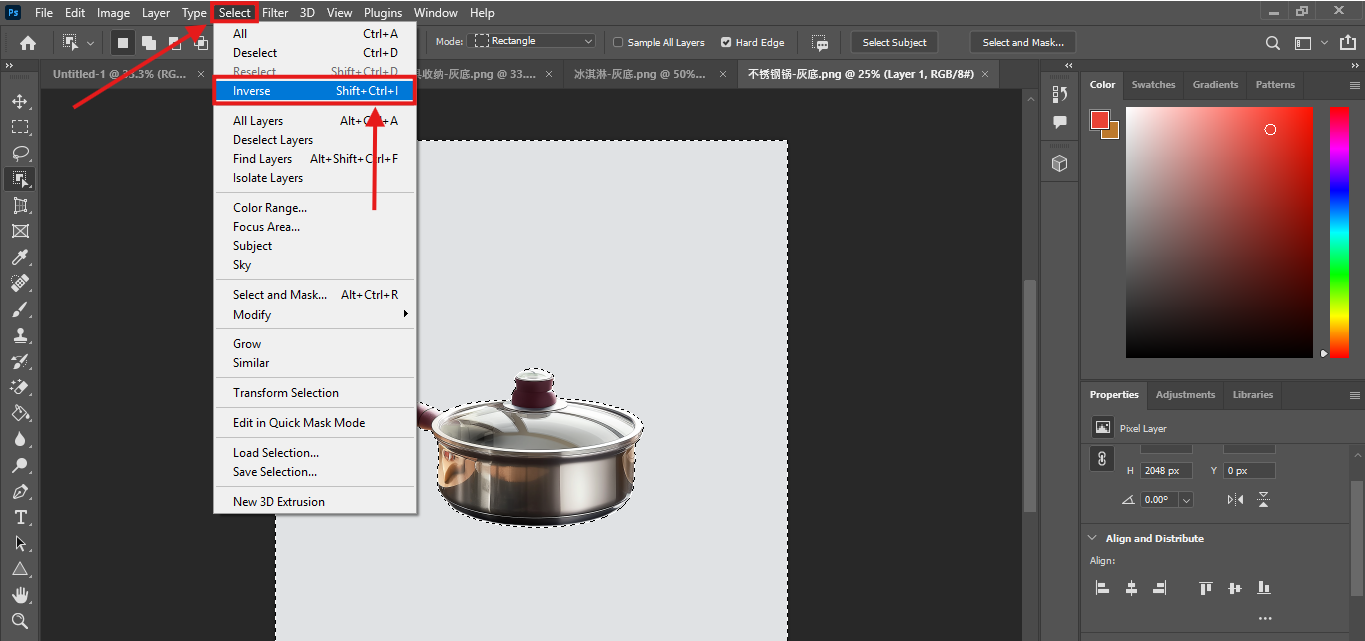
Step 3: Invert the Layer
Before you begin to remove the background, click on ‘Select’ and then on ‘Inverse’. Then, press ‘Delete’, and the background will be removed.
Step 4: Export your image
Then click ‘File’ in the top left corner and then on ‘Export’.
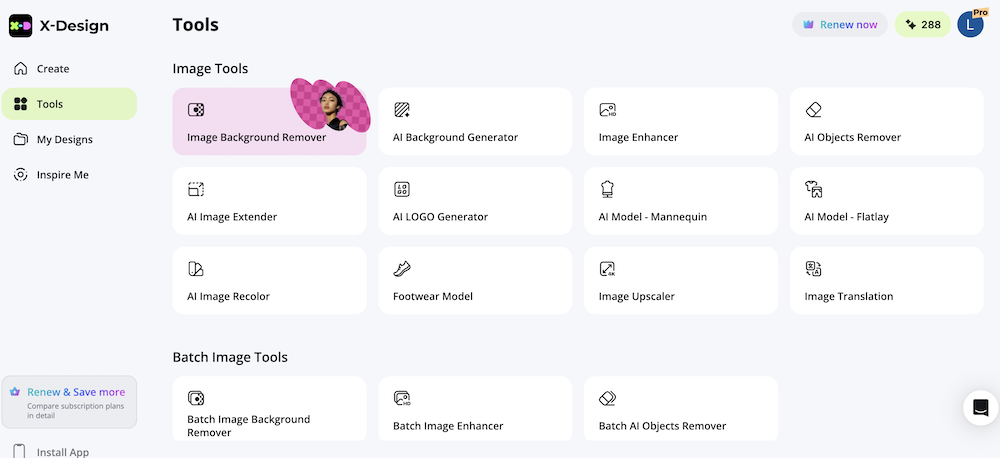
Use X-Design Background Remover Tool: Photoshop Alternative
The tools within the Adobe Photoshop suite are impressive. But they are difficult to use and master. Additionally, a subscription is required to use Adobe Photoshop. That’s why we have brought you an alternative that allows you to remove image background in the quickest way possible: X-Design Image Background Remover. You also get free credits if you are just starting your design journey with X-Design. It is the perfect alternative if you have been wondering how to remove the background in Photoshop.
Here’s how you can use the Image Background Remover by X-Design to remove the background instantly:
Step 1: Upload Your Image in the Image Background Remover
This is a web-based tool. You don’t need to install it on your device. Start by simply clicking ‘Upload’ and then choosing a file from your device.
Step 2: Open the Background Remover
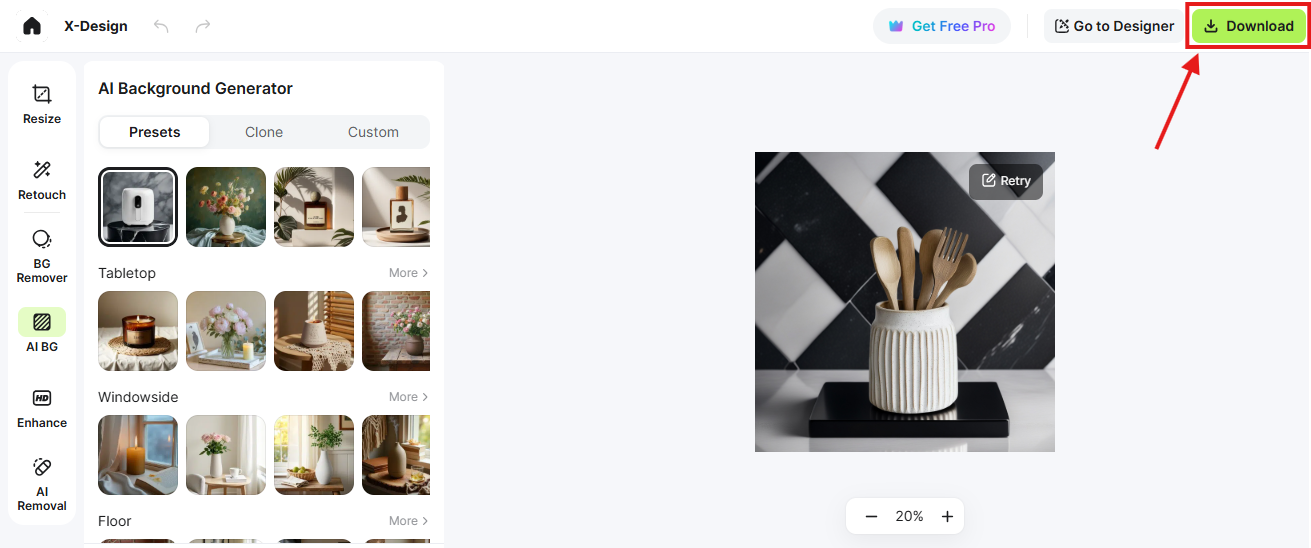
On the left toolbar, select ‘Background Remover’. You will be prompted to select a custom background or an AI-generated one.
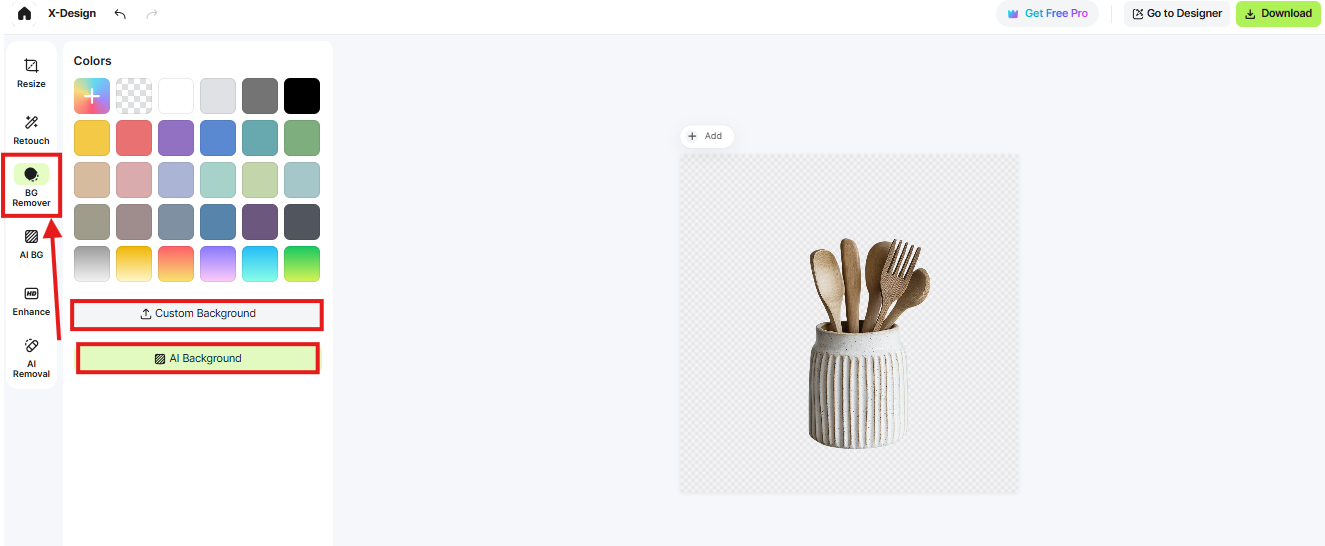
Step 3: Put a new background on your subject
When the background has been removed, you can choose an image from the list. It will be added to the subject instantly. Then export the file using the ‘Download’ button in the top right corner.
Removing image backgrounds is simple, quick, and totally free for new users. X-Design Image Background Generator has numerous AI-generated backgrounds that you can use on your image to make it more professional. Moreover, the text-to-image feature allows you to enter a prompt and get instant results based on your vision.
Conclusion
Adobe Photoshop has diverse image editing capabilities. It allows you to remove backgrounds from images. Four tools used for this output are the Magic Wand tool and the Quick Selection tool, along with the Background Eraser tool and the Layer Mask feature. All of these deliver accurate and prompt results. They also cater to the popular query: how to remove the background in Photoshop! It is essential to note that Photoshop can be tedious for beginners. You can use an alternative tool like X-Design Image Background Remover. It not only removes the background but also inserts a high-quality background instantly. Compared to Photoshop, X-Design is fast and simple. It delivers highly accurate subject selection due to its AI technology. New users can explore multiple features of X-Design for free!
Related articles

4 Ways To Remove Backgrounds from Photos

Gemini Images Too Blurry? Here’s How to Make Them Crystal Clear in Seconds

How to Remove White Background from Images
